Qt Creator for SBE201
This semester we will rely on the Qt Creator as an Integrated Development Environment (IDE).
Qt Creator ships with the powerful and rich Qt project that features a large (or maybe the largest) spectrum of C++ libraries.
It is interesting to learn that many famous applications and organizations largely depend on Qt project. See the following lists from Wikipedia to learn about the most famous users of Qt: 3 Qt in use
Installing Qt Creator
Install Qt prerequisites
In Ubuntu, open your terminal (Ctrl+Alt+T) and copy paste the following command (to paste in the terminal: Ctrl+Shift+V), then hit Enter:
sudo apt install build-essential cmake libgl1-mesa-dev wget
Notes: sudo and apt
sudo: stands for super user do, and this is required when you make system-wide changes, like installing new libraries for the system. For detailed manual, write in the terminalman sudothenEnter. PressQto close the manual and return to the terminal.apt: installation tool that links with large software repositories, so when you writeapt install x, it will search for a packagexwithin a stored database of the the available software in the linked repositories. You can install several packages at once like what we did in the command. Also, for detailed manual, write in the terminalman aptthenEnter. PressQto close the manual and return to the terminal.
Download the offline installer
In this page: Offline Qt Downloads, you will find different download link for each system.
We will download from the following link Qt 5.14.1 for Linux 64-bit (1.2 GB) (Right click and Save link as). Alternatively, you can download files from the terminal using wget application. So, copy the download link and give it to the wget:
wget -c http://download.qt.io/official_releases/qt/5.14/5.14.1/qt-opensource-linux-x64-5.14.1.run
Notes: wget
- This will download
qt-opensource-linux-x64-5.14.1.runinto the terminal working directory. When you first open the terminal, its working directory is your home directory~. - The flag
-cmeans we askwgetto support continuing download in case the internet connection has broken, so it doesn’t download the whole file again. More details can be found in the manualman wget.
Installation
After downloading qt-opensource-linux-x64-5.14.1.run, from the terminal issue the following commands:
chmod a+x qt-opensource-linux-x64-5.14.1.run
sudo ./qt-opensource-linux-x64-5.14.1.run
This will pop up the installation wizard:
Press Next:
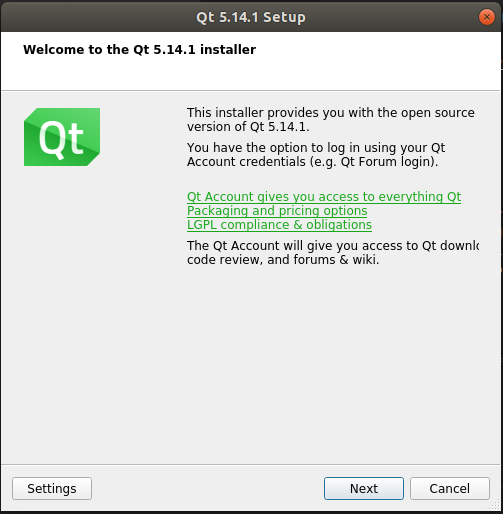
Create an account for the first time, then press Next:
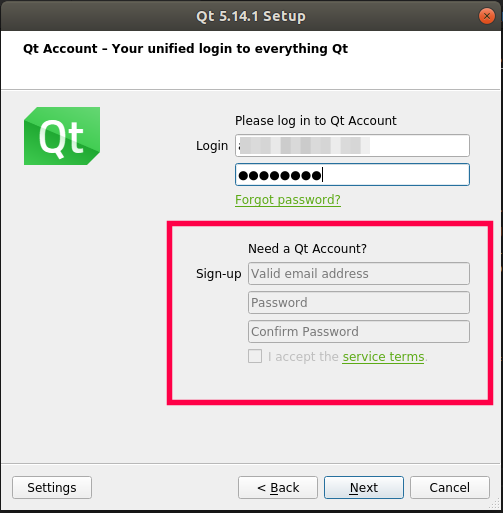
Tick for your consent to the obligations shown

Next

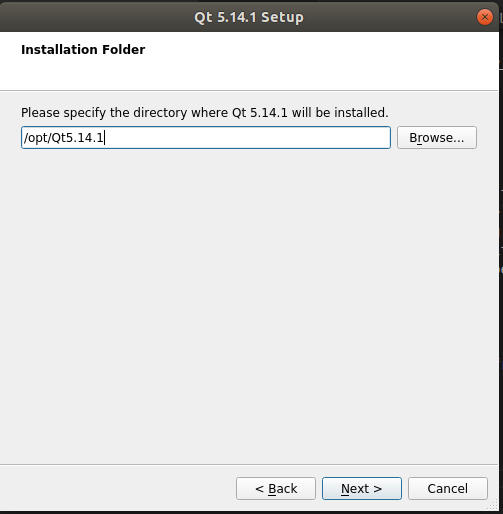
Specify the location of the installation, then Next:
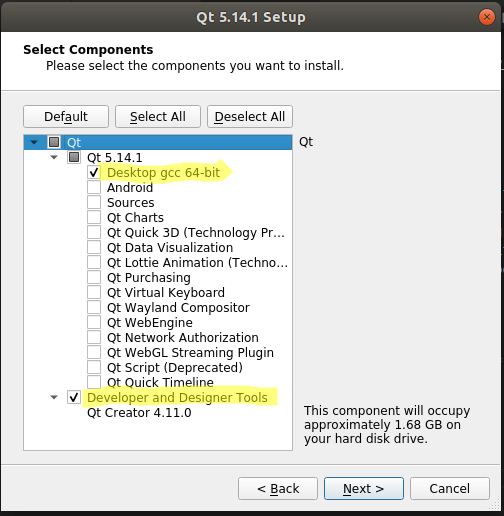
Just select the two items highlighted, then Next:
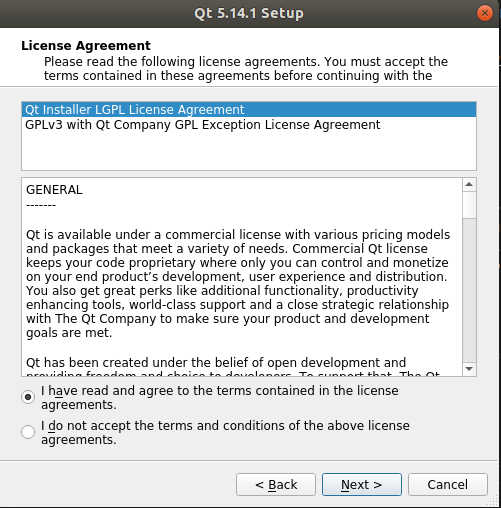
Agree for the listed licenses, then Next:
Finally proceed with Install, and Finish.
Run your Qt Creator
For the first time, open the Ubuntu dash 
/opt/Qt5.14.1/Tools/QtCreator/bin/qtcreator.sh
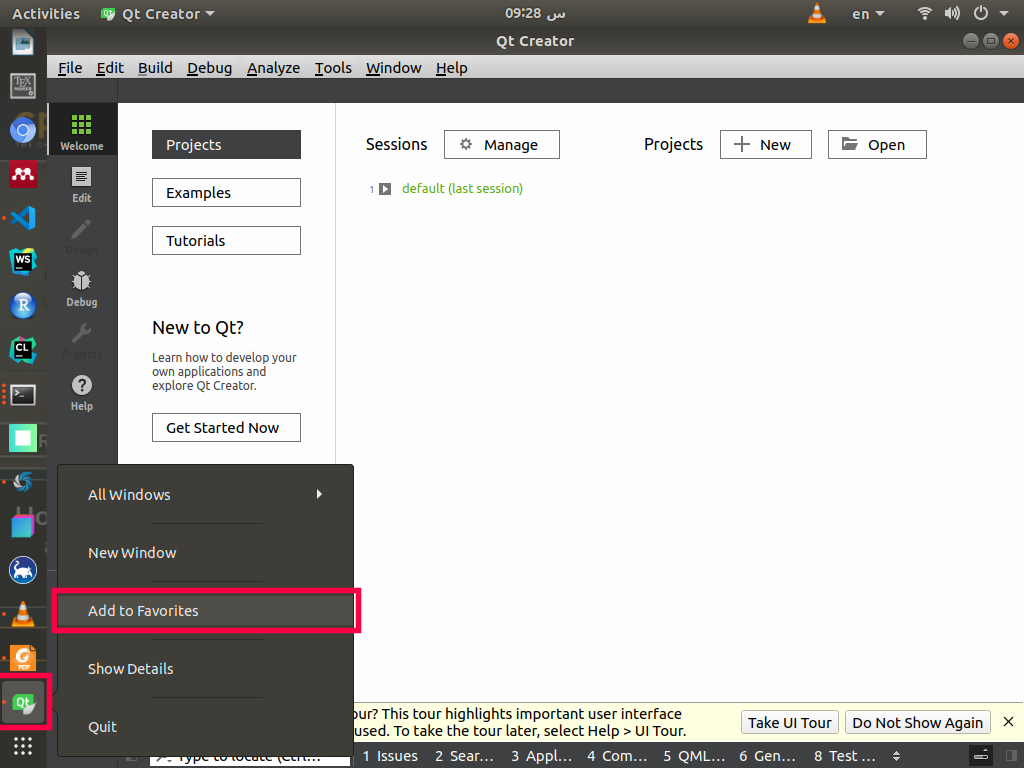
Finally, to add the Qt Creator to the menu on the left as a shortcut, right click on the icon, then press Add to the favourites.
Running your first project
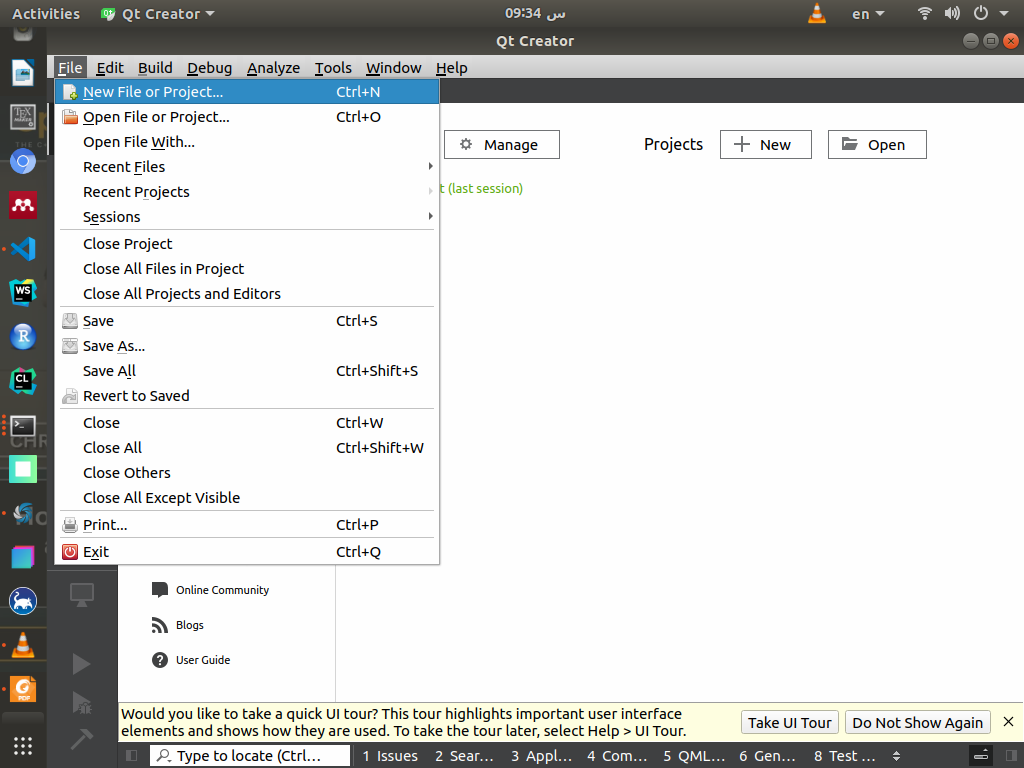
Open Qt Creator, and from the menu bar press File->New File or Project..
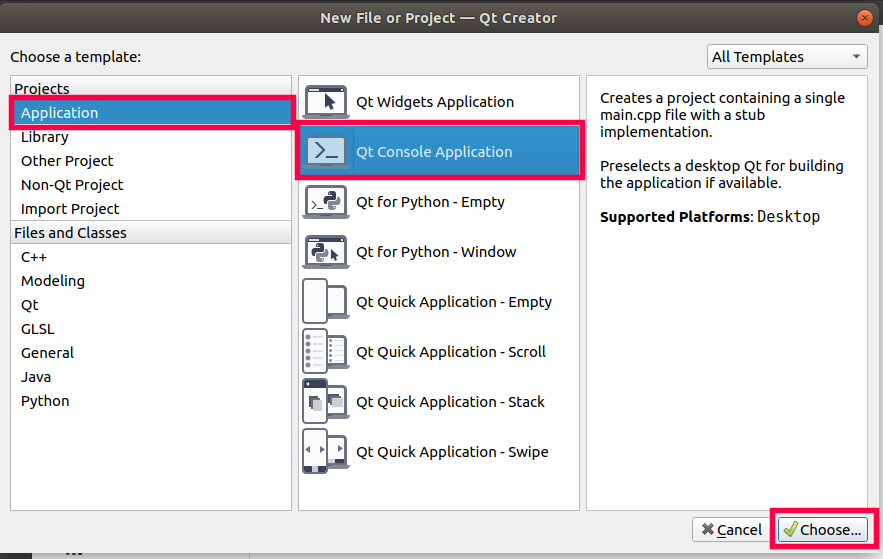
From the dialog menu, select Application->Qt Console Application->Choose
Select the location and the name of the project

Note: file naming
- In general, avoid using spaces in a file or a folder name. Instead, use
-or_to separate words. Alternatively, you may use PascalCase naming convention.
Use CMake as a build system:

Now leave this as it is:

Leave as it is:

Now all is good, click Finish:
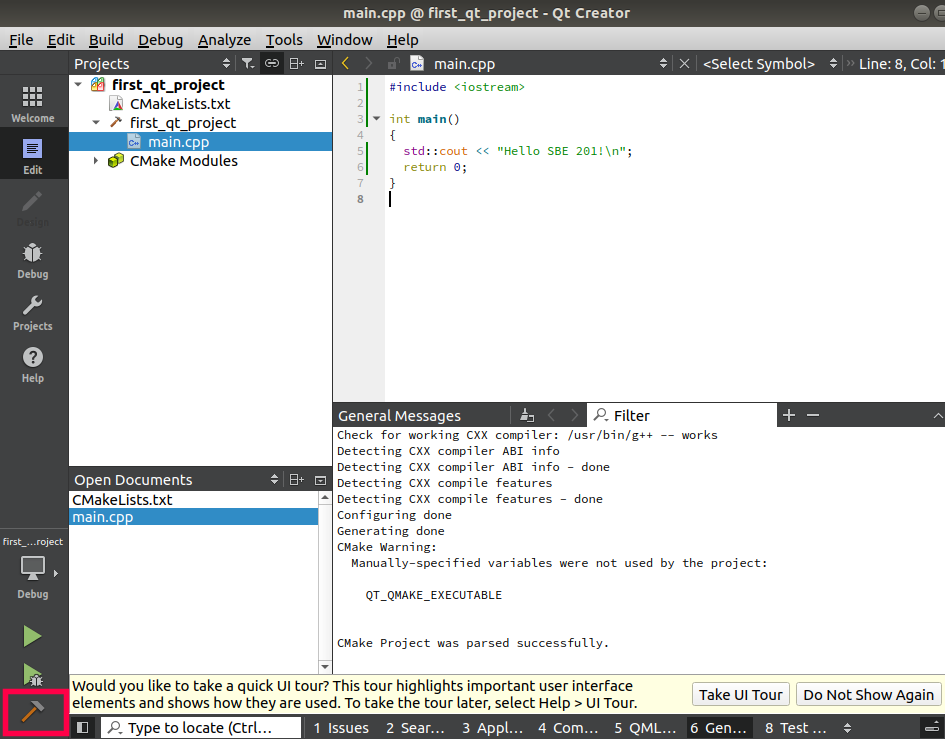
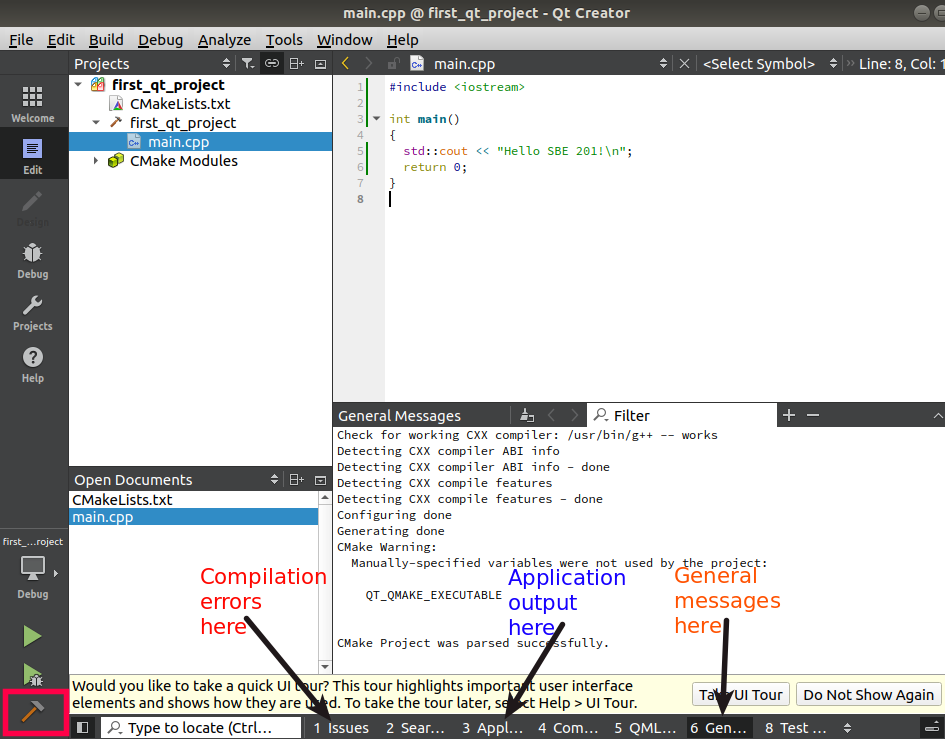
Finally, you will find the file main.cpp opened with the following content there:
#include <QCoreApplication>

int main(int argc, char *argv[])
{
  QCoreApplication a(argc, argv);

  return a.exec();
}
Instead let’s use the following code:
#include <iostream>

int main()
{
  std::cout << "Hello SBE 201!\n";
  return 0;
}
Then press on the Build icon to compile your code:
