Overview of Raspberry Pi zero
- Introduction to Raspberry PI
- Raspberry PI zero W specs
- Installing The OS
- Controlling Pi remotely
- Basic linux commands
- Getting started with python
- Pi physical computing with python
- Useful links
Introduction to Raspberry PI
Raspberry Pi is a mini computer. It is basically a cheap PC for learning purposes and practising programming.
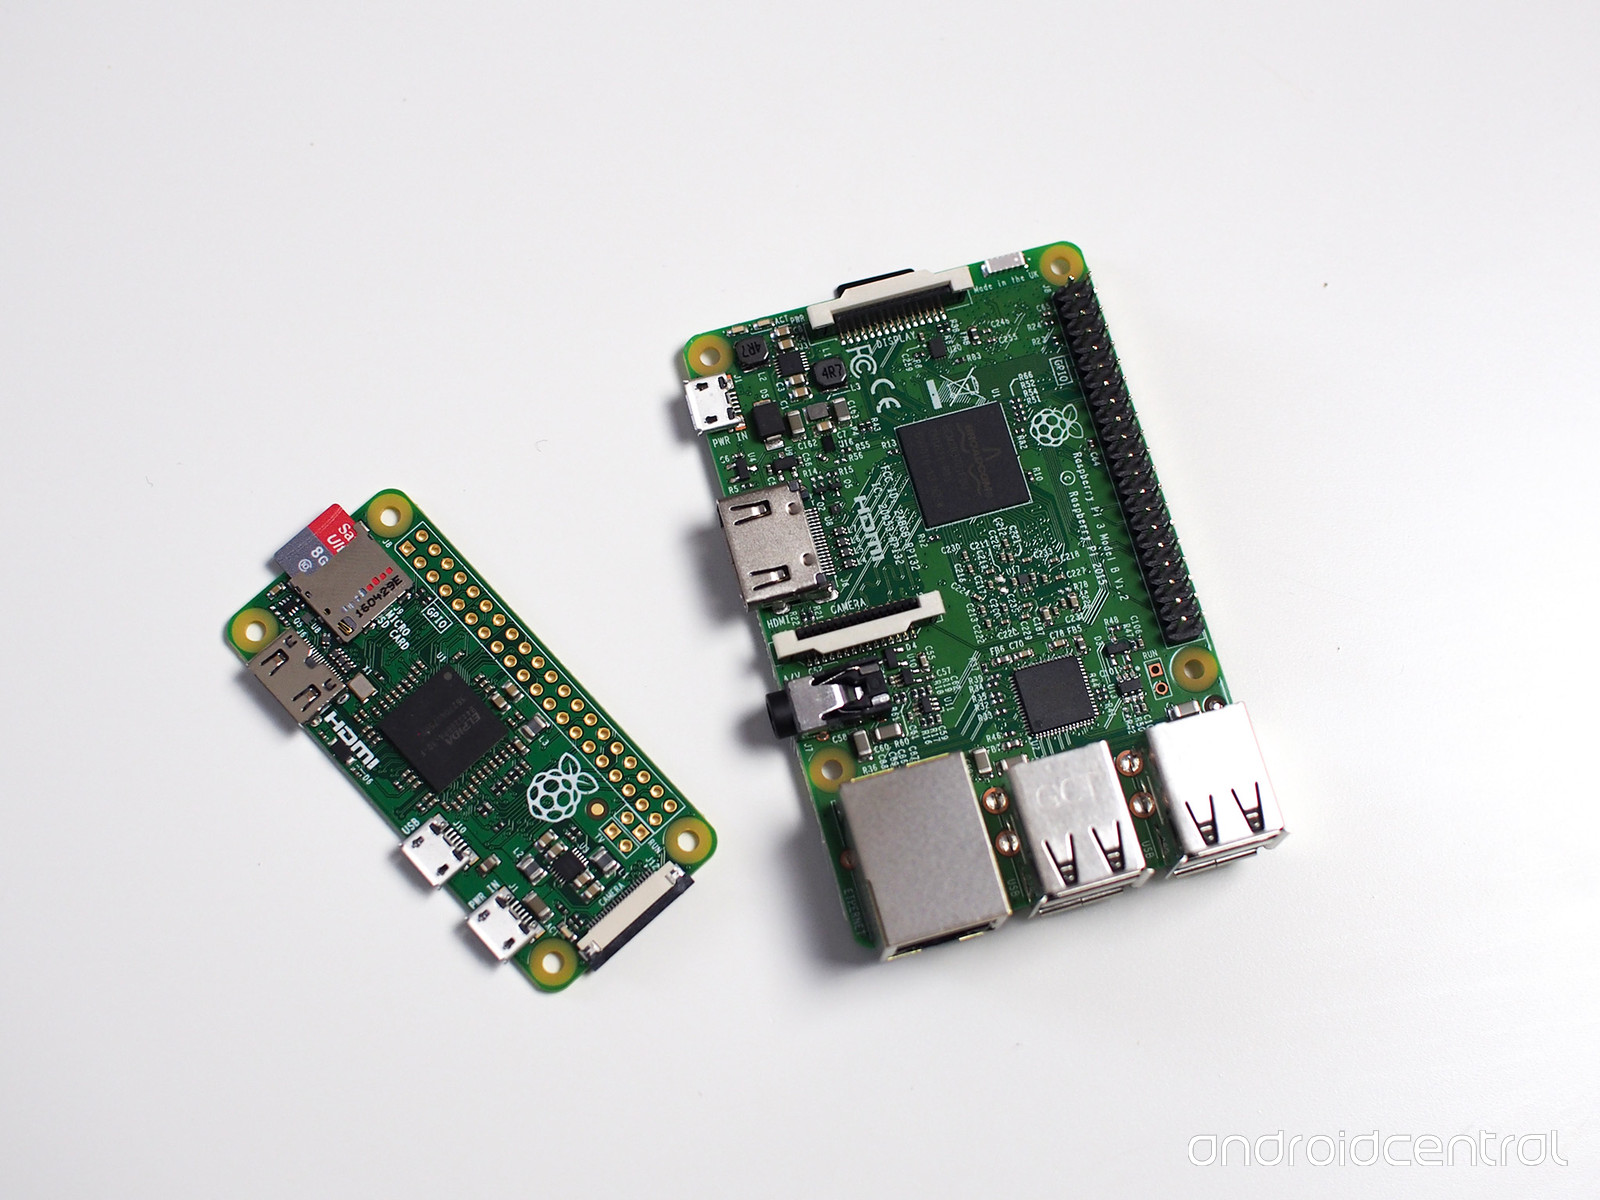 Raspberry is just like apple a name of fruit, Pi stands for python interpreter which is provided.
Price of PI 3 about 35 dollars, PI zero W only 5 dollars
Raspberry PI zero W specs
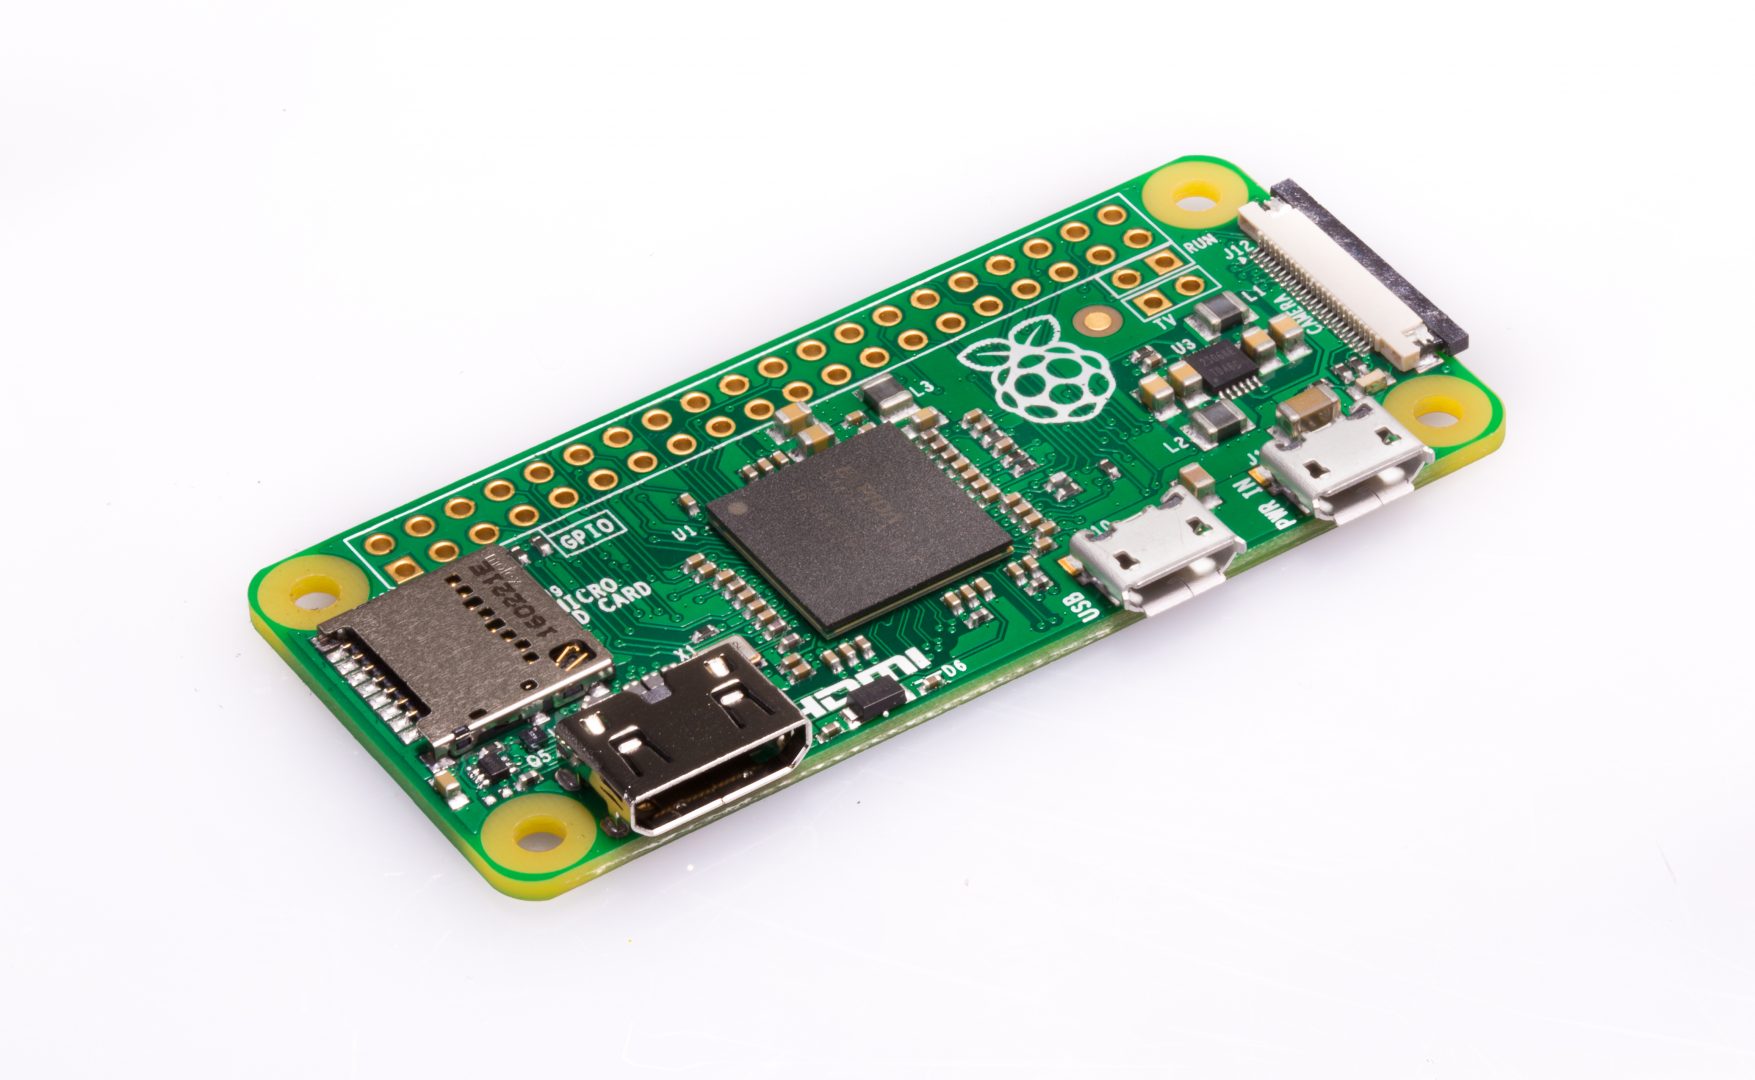
- Size : 65mm x 30mm
- 1GHz single core processor
- 512 MB RAM
- Wireless
- 40 GPIO Pins
- mini HDMI port
- mini USB Port
- SD card area
- Camera Connector
Installing The OS
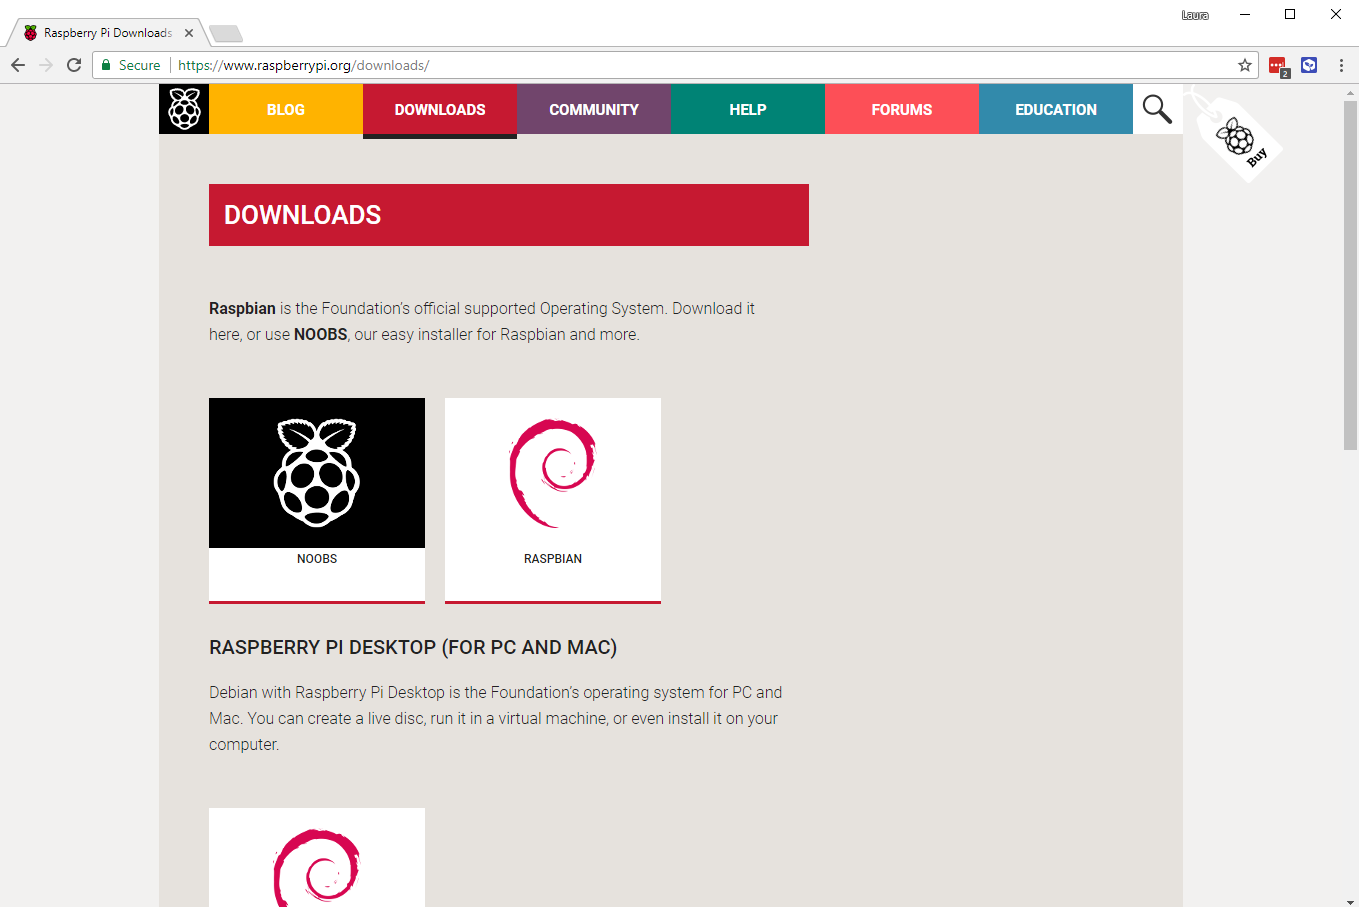
- Head to download page and download the image of raspbian image or use NBOOS.
- Format the SD Card (min 8G SD card)
- Burn the image on the SD card
for linux
sudo dd if=file.img of=/dev/sdx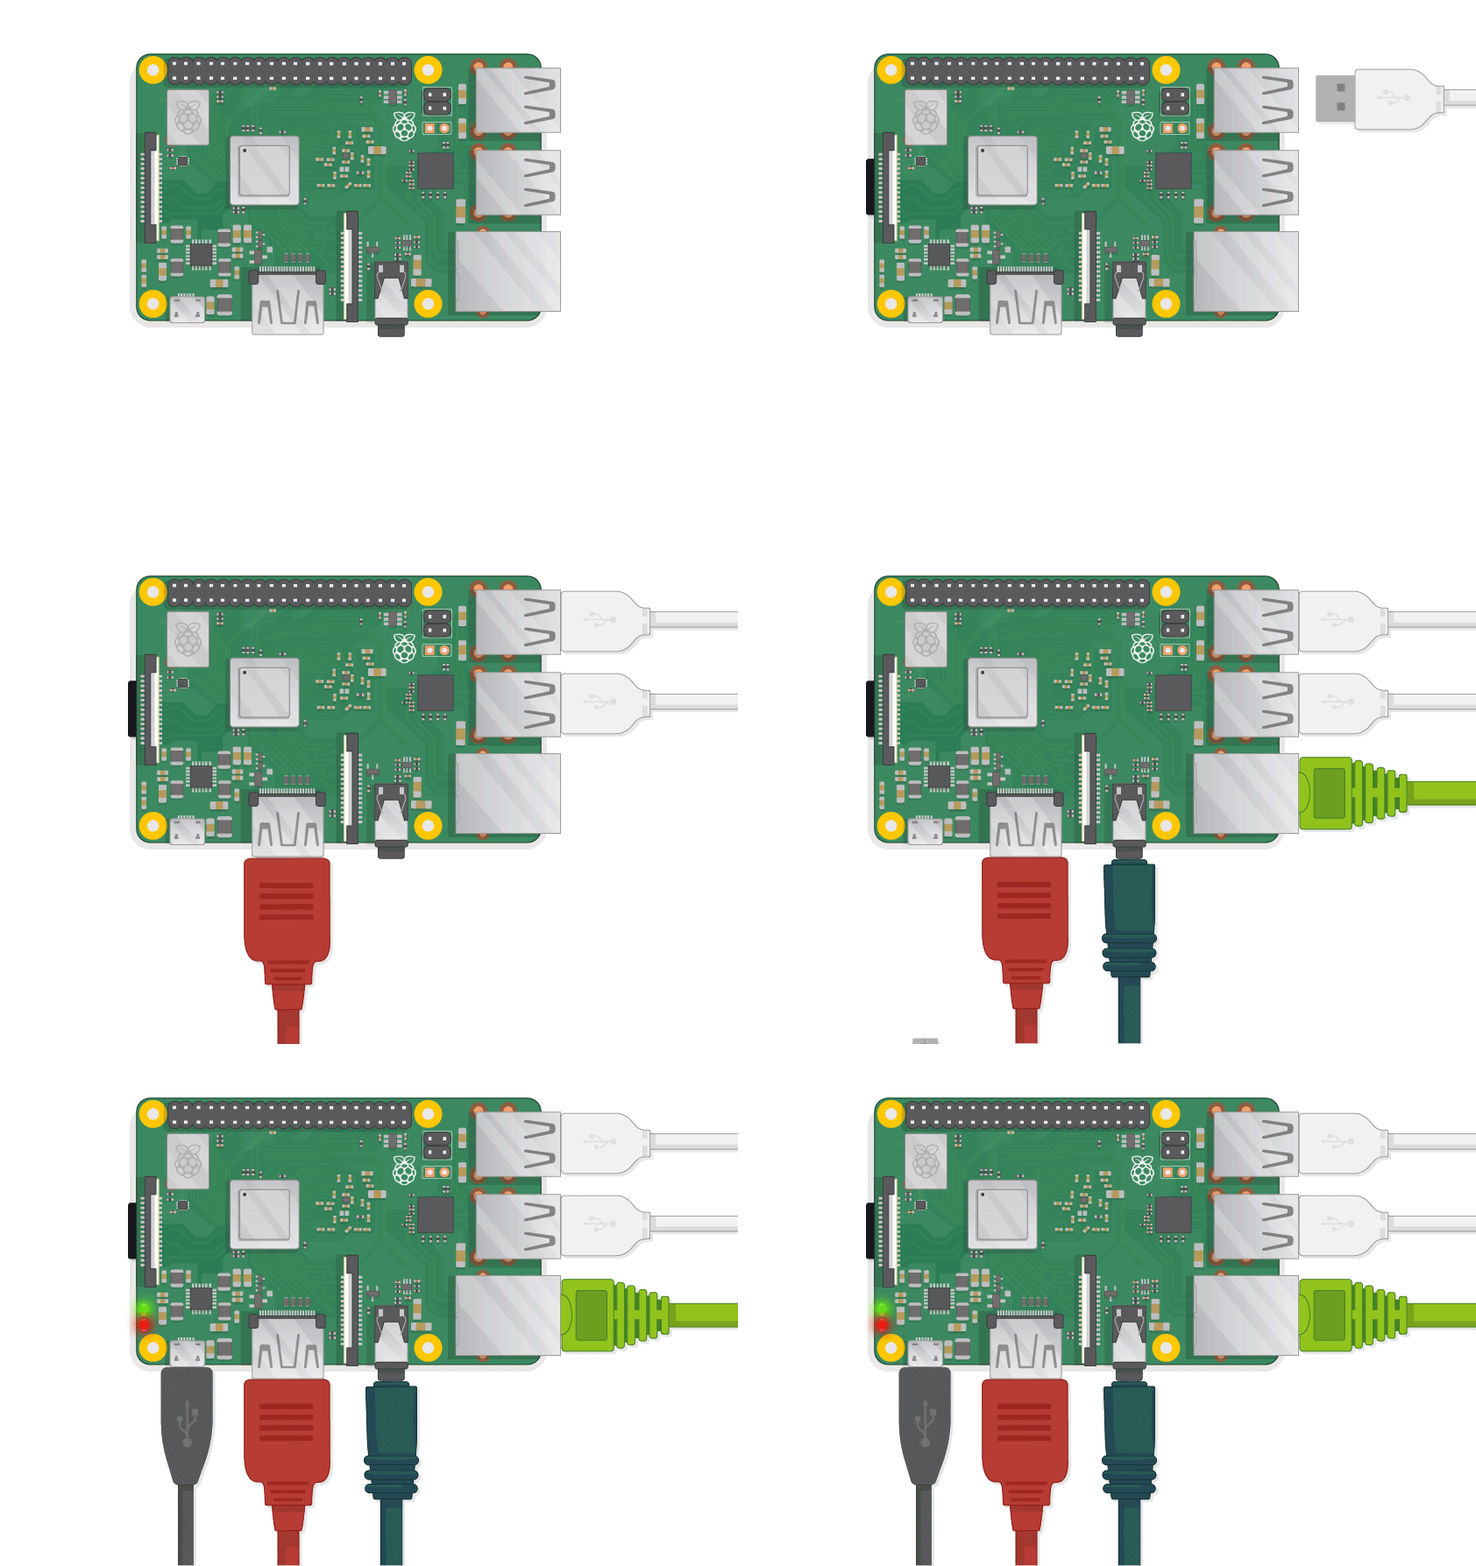
- Add SD card to the board
- Connect Mouse/Keyboard
- Connect the display
- Connect the power (5V DC 1 or 2A)
You can can see more details setting up your pi here.
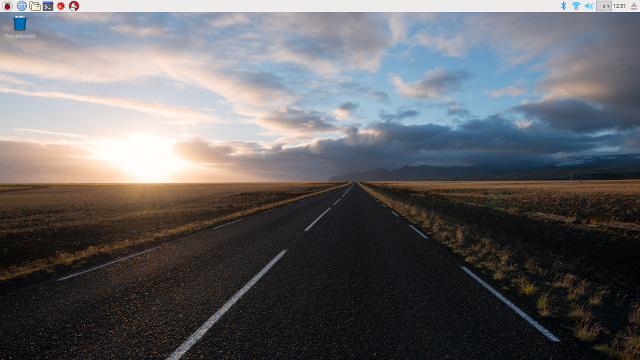
Pi Desktop
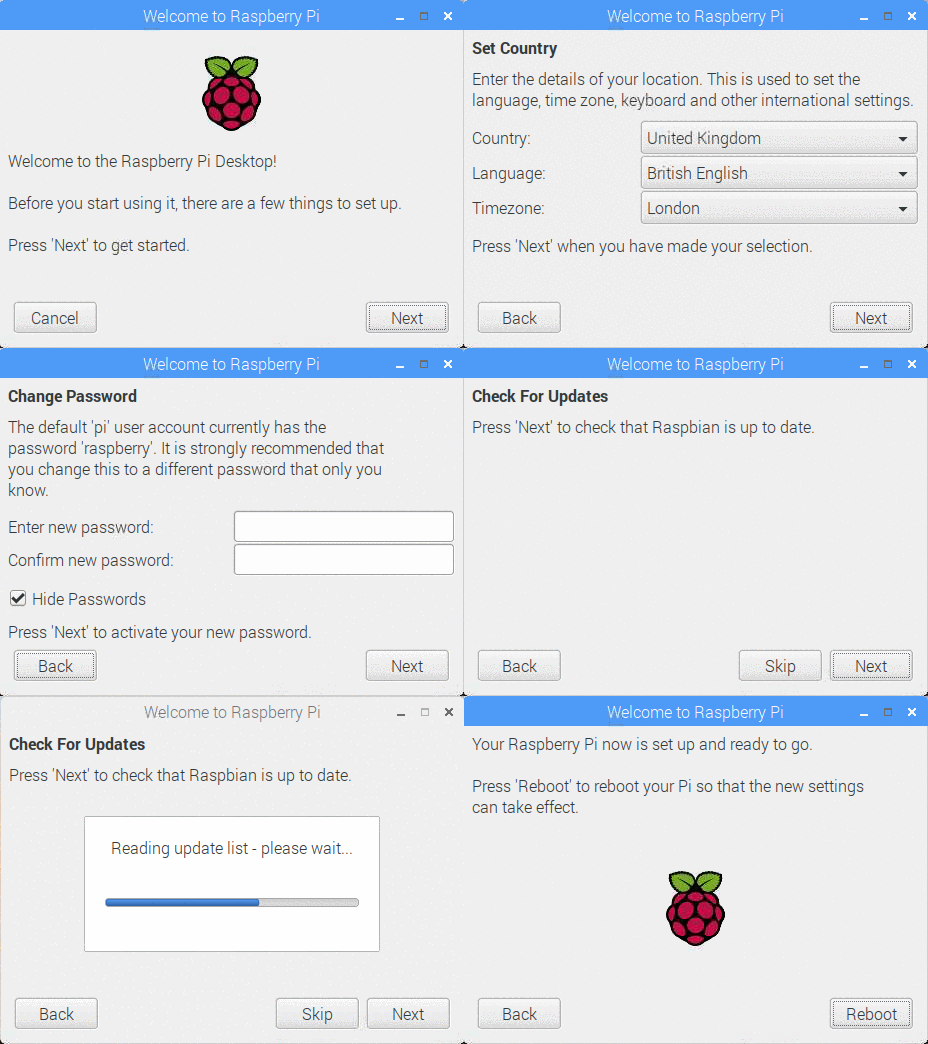
At first you will have the Pi wizard
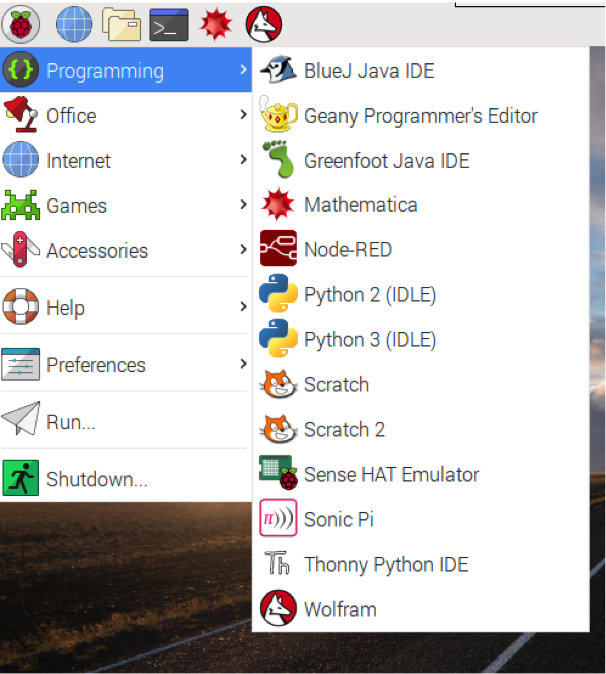
System is installed with some interesting applications
- Programming
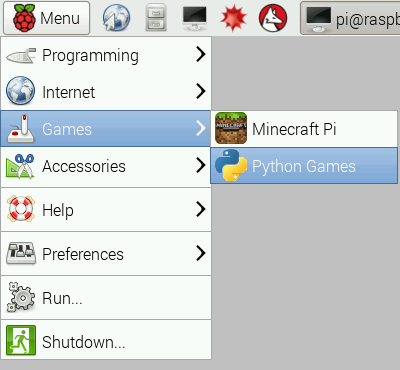
- Some games
- Other accessories
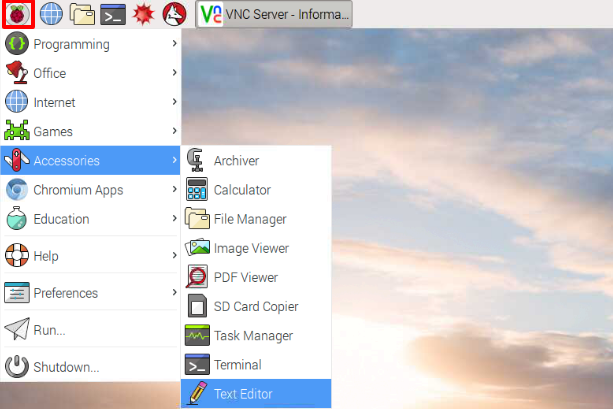
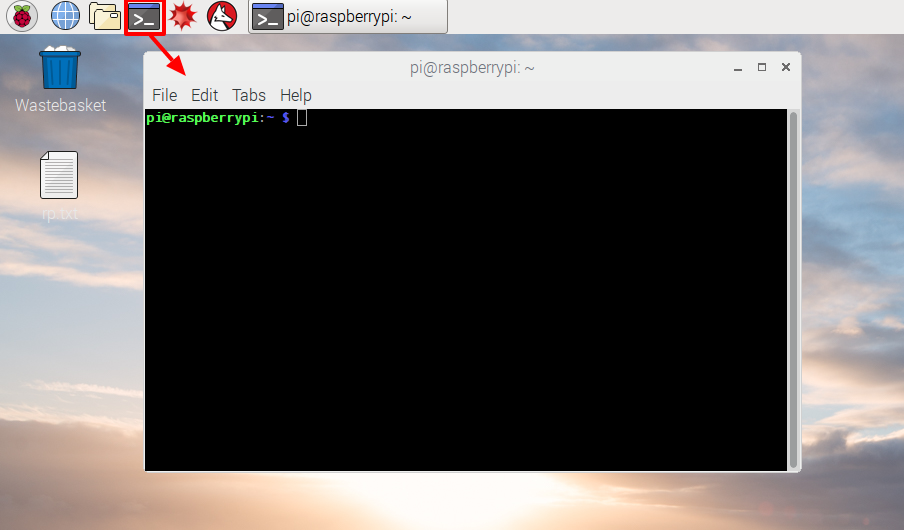
- Terminal
Controlling Pi remotely

Actually you don’t have to connect the display, mouse and keyboard every time. You can enable ssh and access pi through any other computer.
Using SSH
- Open the terminal
- Type
sudo raspi-config
- Use arrows to open Interfacing options and enable SSH (Remote command line access)

Or basically you can enable it from preferences and Raspberry pi configuration

- To access raspberry pi from your computer install ssh
sudo apt-get install ssh
ssh pi@192.168.1.200 # Or the IP of your PI
- For windows users you can use PuTTY. Check this link for more help
Use VNC
Make sure you enabled VNC.
- Open pi from your computer using its IP

And now you can work from your computer

Basic linux commands
Operating system of raspberry pi is based on linux. Here some basic commands
| Command | Meaning |
|---|---|
| ls | List files in current directory |
| cd | Change directory |
| pwd | print working directory |
| rm filename | remove filename |
| mkdir directoryname | Make directory named directoryname |
| rmdir directoryname | remove empty directory |
| mv oldfile newfile | Move (rename) oldfile to newfile |
| cp oldfile newfile | Copy oldfile to newfile |
| man command | Display manual of command |
| date | read system date/time |
| sudo perform as | root user |
| ./program | run program |
| exit | Quit terminal session |
Getting started with python
Python is interpreted high level programming language for general purpose computing.
Variables
Python is untyped language
x = 5
y = 'Hello SBME'
Lists
# Initialize the list
myList = [2, 55, 565]

# add an element
myList.append(8)

print( myList ) # ??
print( myList[0] ) # ??
print( myList[3] ) # ??
print( myList[4] ) # ??
Arithmetic Operations
x = 19
y = 18

z = x / y
z = x * y
z = x + y
z = x - y
Comparison Operators
| operator | meaning |
|---|---|
| == | Equal to |
| != | Not equal to |
| < | Less than |
| > | Greater than |
| <= | Less than or equal to |
| >= | Greater than or equal to |
Logical Operations
x = True
y = False

x or y
x and y
not x
If, elif, else
x = 25
y = 20

if x < y:
    print("y is greater than x")
elif x == y:
    print("x and y are equal")
else:
    print("x is greater than y")
Loops
for i in range(10):
  print( i )

i = 0
while i < 10 :
  print( i )
  i += 1
Functions
def mean( list ):
  sum = 0
  for element in list:
    sum += element
  return sum / len( list )

m = mean([1,12,42,1,23,12])
print( m )
Importing Libraries
import numpy as np
from gpiozero import LED
Pi physical computing with python
Full tutorial is available here
GPIO
Pi has 40 Pins
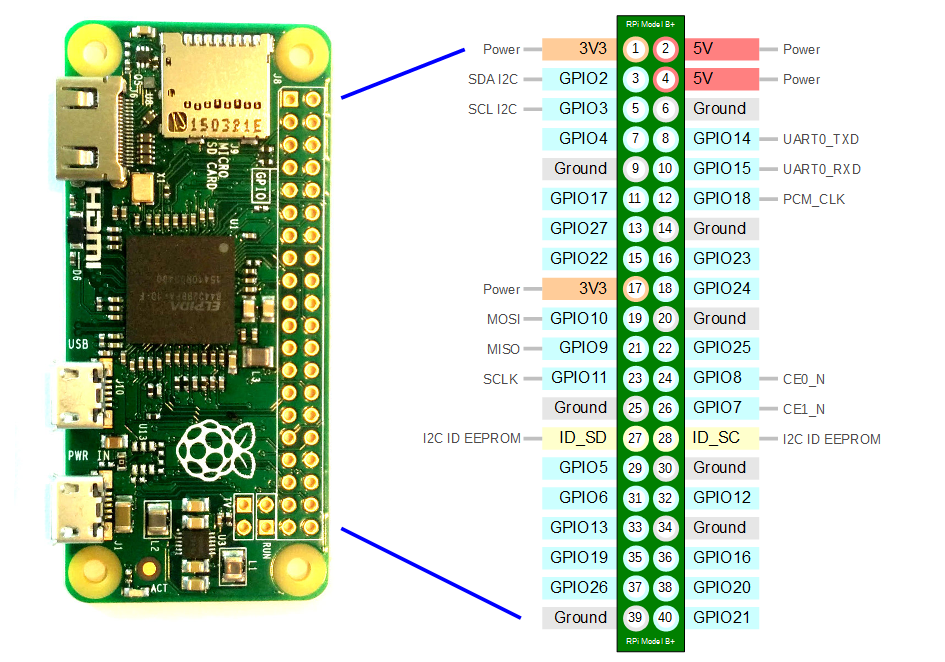

Note
- Using 5V to drive something like motors could destroy the board
- Maximum input for GPIO pins is 3.3V. 5V could destroy the board
Lighting a LED
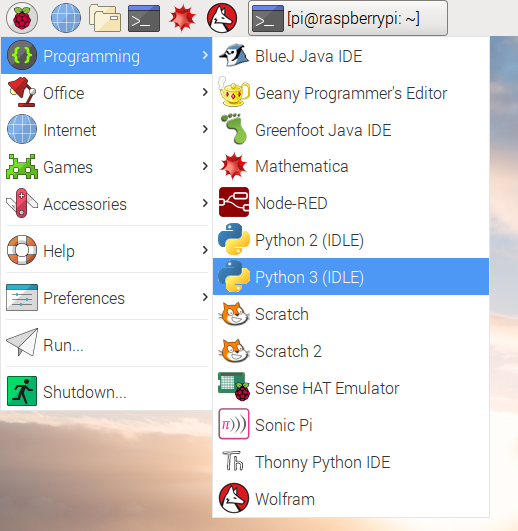
- Open python3
just type on terminal
$ python3
or you python IDLE3
- Connect the led to GPIO17

- Code
>>from gpiozero import LED
>>led = LED(17)
>>led.on()
>>led.off()
Blinking example
- Make a new file blink.py
you can use nano editor or vim.
$nano blink.py
or
$vi blink.py
- Add your code
from gpiozero import LED
from time import sleep

led = LED(17)

while True:
    led.on()
    sleep(1)
    led.off()
    sleep(1)
- Run the example
$python3 blink.py
Using Buttons
Connect the button

from gpiozero import Button

button = Button(2)
button.wait_for_press()
print('You pushed me')
Toggle the led with the button
from gpiozero import LED, Button
from signal import pause

led = LED(17)
button = Button(2)

button.when_pressed = led.on
button.when_released = led.off

pause()
More examples
You will find more examples for different hardware interfaces in the tutorial link. The library supports
from gpiozero import Buzzer, TrafficLights, LightSensor, MotionSensor, DistanceSensor
Analog inputs
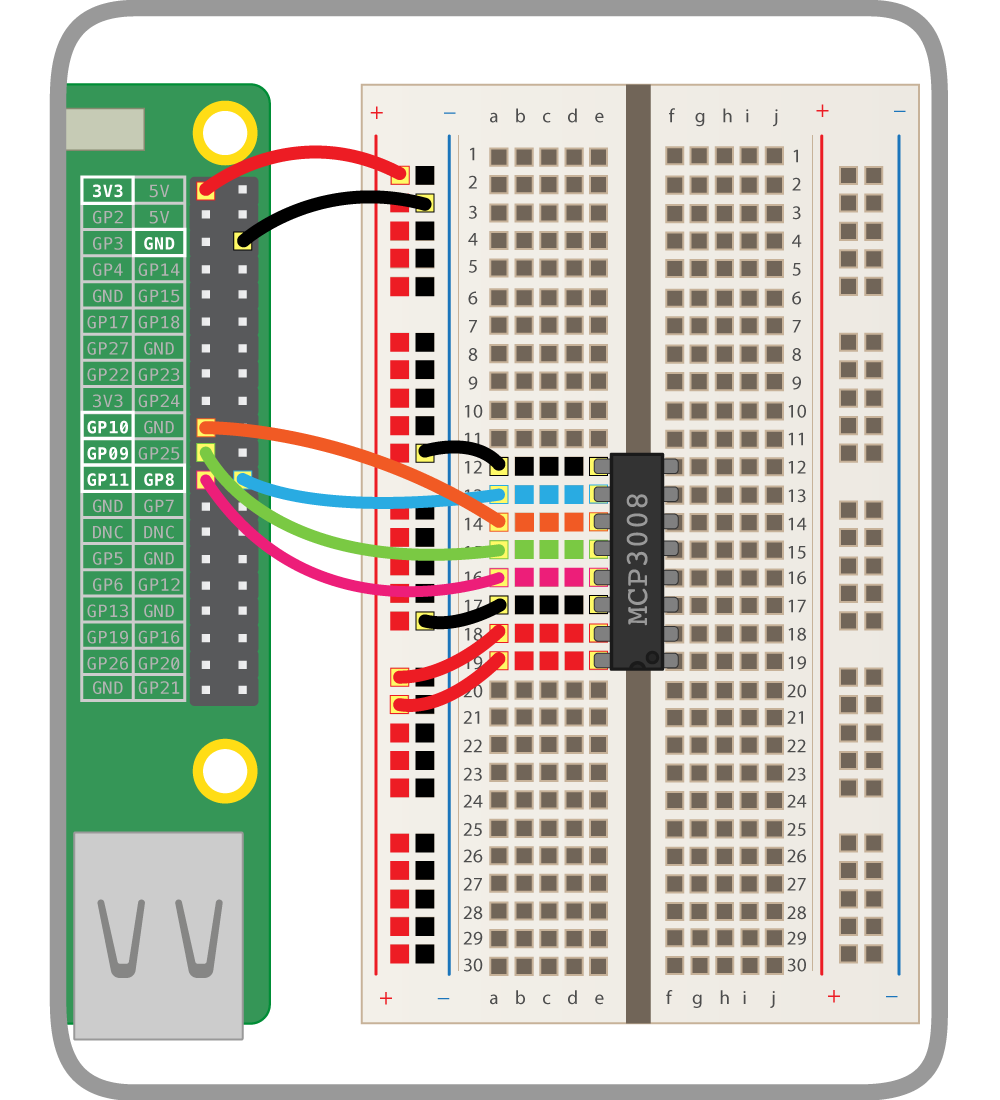
All GPIO pins of pi are digital. To connect pi with analog sensors you have to use an ADC to make it digital. Communication for analog is using SPI protocol.
They recommending the usage of 8 channels ADC MCP3008
This is the connection with Pi
And you have another 8 pins to connect the analog device like potentiometer
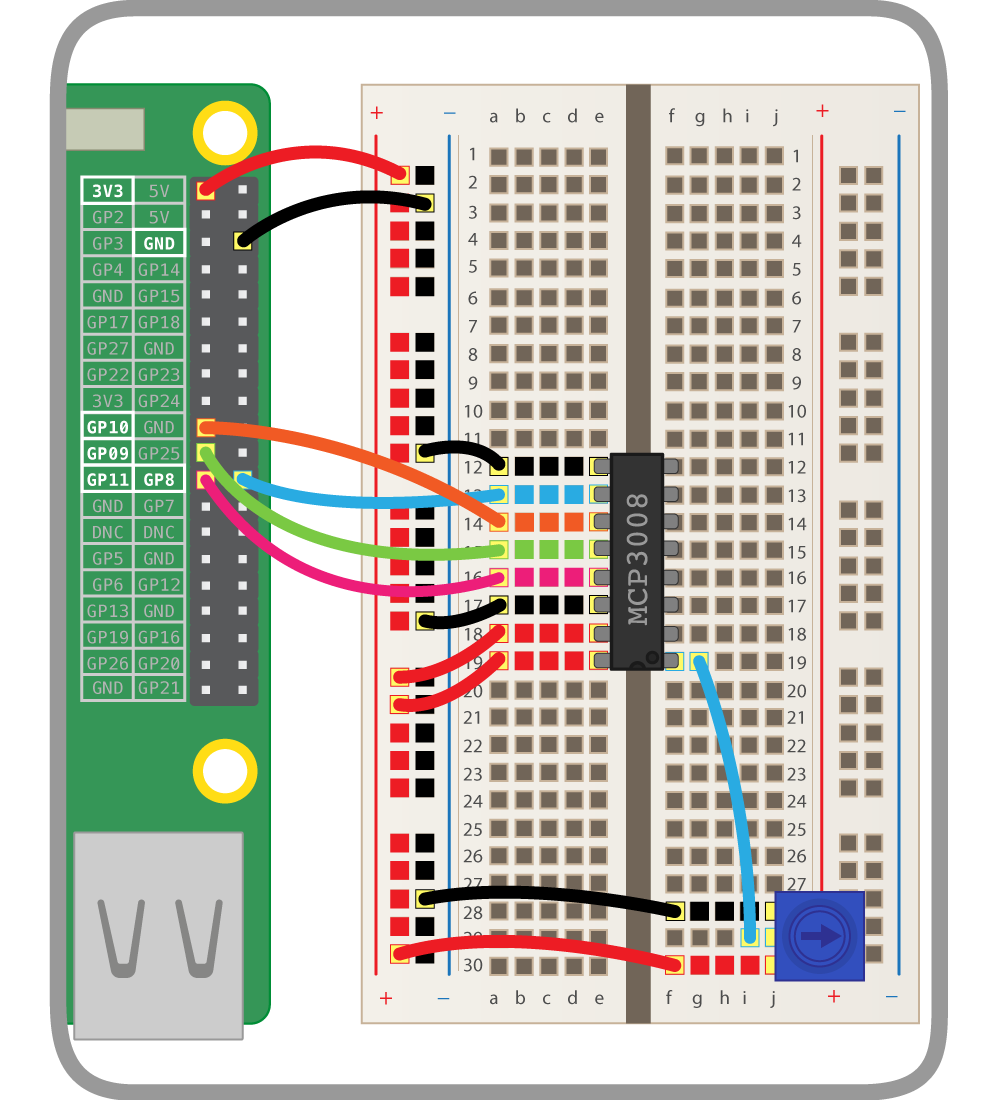
Code
from gpiozero import MCP3008
# Potentiometer is connected to channel 0
pot = MCP3008(0)
# Get the analog value
print(pot.value)
Using motors
Use H bridge and Pi to control the motor

from gpiozero import Motor

# Initialization
motor1 = Motor(4, 14)
motor2 = Motor(17, 27)

# Move forward with full speed
motor1.forward()
# Move forward with half speed
motor1.forward(0.5)
# Move backward with half speed
motor2.backward(0.5)
# Reverse
motor1.reverse()
# Stop
motor1.stop()
Two wheeled Robot
from gpiozero import Robot
# Initialize it
robot = Robot((4, 14), (17, 27))
# All movements
robot.forward()
robot.backward()
robot.reverse()
robot.right()
robot.left()
robot.stop()